Part 4: Permanently Saving and Accessing Your Lots
A. Share Your Saved Lots
1. In LIVE mode, click on EDIT TOWN.
2. Click on either the RESIDENTIAL LOTS icon or PUBLIC LOTS icon -- based on the type of lot in which you want to permanently have access.
3. Select the lot. Click on the SHARE icon and click on OK .
This will enable you to upload the lot to your STUDIO under your PAGE menu in your TheSims3.com account.
B. Upload Your Saved Lots
From the game launcher, UPLOAD your lots.
The game will let you know if it successfully uploaded.
C. Permanently Access Your Lots
The lot is now permanently saved and accessible to you forever and a day.
From your STUDIO, you can now select and SAVE a lot to download it in any of your Sims 3 games. When it is coming from within your own studio, you do not have to worry. The game is not going to exchange it. It is yours... period.
Part 3: Permanently Saving and Accessing Your Lots
A. Access Your Saved Residential Lots in Your Library -- includes your created lots, remodeled lots, and lots from the game and expansion packs
1. While in LIVE mode, click on EDIT TOWN.
2. Click on the RESIDENTIAL LOTS icon (looks like a house). This pops up pictures of all of your residential lots in order from newest to oldest.
3. Click on the lot of your choice to place it. If you have the lot size in your deion box, that will make it easier for you to know where it will fit.
You are always able to place it on a lot of the exact same size, however, you must make sure the front of the house is facing the main road. You are always able to place the residence on a larger lot, but never a smaller lot.
4. SAVE the lot to your library.
5. SAVE the game when you return to LIVE mode. Always SAVE your game!
B. Access Your Saved Public Lots in Your Library -- includes your created lots, remodeled lots, and lots from the game and expansion packs
Follow the directions in Section A -- with one exception: click on the PUBLIC LOTS icon.
Part 2: Permanently Saving and Accessing Your Lots
B. Saving Your Created Lot - continued
4. In the menu box, click on SAVE TO LIBRARY icon (look like a file folder). Save your lot.
The lot is now in your game, but not permanently saved yet.
5. To permanently save the lot, go to LIVE mode and SAVE your game.
If you do not do this step, you can lose the lot and all the time and effort you have put into it IF your game freezes, computer freezes, or anything else happens that disables your game.
Do not assume that because you had no problems during your lot editing that everything is going to keep running smoothly.
Do not assume that because everything has been going great and running smooth during game play, that you can wait until you finish your game to SAVE and exit.
Because Sims 3 is prone to crash when you least expect it, SAVE, SAVE, SAVE. Always SAVE and SAVE frequently.
Because EA decided to work on the website at the time I was saving my blog on Creating and Saving Lots, I lost several hours of typed instructions. So I am now breaking down the instructions into Parts 1, 2, 3 and 4.
Part 2: Permanently Saving and Accessing Your Lots
B. Saving Your Created Lot
When you are finished working on a lot, even if you are just taking a break from it to go on with your game play or you are planning to save and exit your game, do the following:
1. Return to LIVE mode, and click on EDIT TOWN.
2. Click on the lot you've been working on. This pops up a menu box with a picture of your lot.
3. Click on the EDIT DETAILS icon (which looks like a pad and pencil) on the lower right-hand corner of the menu box.
a. Name your lot.
b. In the deion, state the size of the lot (i.e. 30x40), the number of bedrooms and bathrooms (i.e. 4bd 2ba), and its amenities (i.e. basement with pool and game room, nursery, garden, playground, gym, fishing pond, pet items, etc.).
c. If this began as a lot created by someone else that you got from the Exchange or TSR, you should keep the original lot name, and indicate that you remodeled it. For example, if the lot was "The Guardian", you would type in the deion: "The Guardian" remodeled by LindaLee43.
d. If the lot is simply part of the base game or an expansion pack, you can do what you want with it and make it your own after remodeling and landscaping.
Part 1: Permanently Saving and Accessing Your Lots
I've been playing Sims 3 since August of 2010. There are so many lots I created from scratch or edited to look the way I like. But I lost them whenever I had to rebuild a crashed computer or I started a new game. It was not until earlier this year that I realized there was a way I could have been permanently saved those lots, Sims, and favorite items so that they would always be available to me.
The steps I am going to share regarding lots should be applied to saving Sims (people and pets), furniture, walls, patterns, plants, décor, etc.
I tend to type in tips as I go, so bear with me.
Steps to Permanently Saving a Lot
A. Creating a New Lot
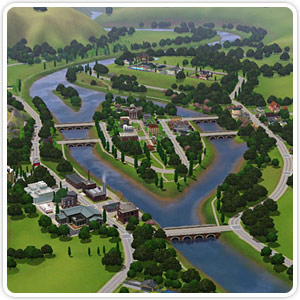
1. During LIVE mode, open the menu and select EDIT TOWN.
2. Select an existing empty lot, bull doze one you want to use, or place a new lot on open land that is level.
3. Build your home, business, park, garden, playground, pool, etc. that you want. Add all the features that Sims typically need such as a bathroom, seating, and food source.
Tips for public places:
(1) If this is a public place for your Sims to go to, I like to keep everyone healthy and happy. I provide a small building with separate bathrooms -- each one containing a "never breaks" toilet, good sink and mirror, and often times include a shower for stinky Sims. I make sure there is even a toddler toilet and a trash can for dirty diapers. I include bright lights, windows for sunshine, and nice house doors.
(2) Again, if this is a public place, provide food sources. Picnic tables and a public grill are great. Plates disappear from the picnic table if there is public trashcan.
(3) If you provide a kids toy oven, children can bake muffins to keep from going hungry, but they need a sink to wash the dishes after eating.
(4) If you provide an oven, refrigerator, counter, trashcan, and a sink, adults can prepare dinners and increase their cooking skills. If other Sims are around, they will often eat from whatever your Sims have prepared.
(5) If you provide a counter with a food cash register, make sure you have a sink for your Sims to wash their dirty dishes. The game will provide you with an unemployed Sim to be the food merchant.
(6) If you provide a "professional bar" (not a juice bar), the game will provide a bartender who can prepare individual and group meals.
{See Part 2 for continuation of instructions)